
From the joists up: herringbone in a hall and kitchen
In the hall and dining end we went down to the joists, secured and levelled them, and boarded over in 18 mm plywood. In the kitchen, the tiles came up off the screed beneath, and the plywood was set level with it. Then 32 m² of Haldon Oak herringbone was glued down through all three.
- Project
- Siobhan WVictorian terrace, Weybridge
- Floor
- Haldon Oak rustic herringbone80 × 350 mm · 20/6 mm · brushed and oiled
- Area
- 32 m²Hall, dining end and kitchen
- Base
- 18 mm plywood, level with kitchen screedPlywood over joists in the hall and dining end; screed in the kitchen
- Fixing
- Fully bondedBona R848 adhesive

Down to the joists first.
For Siobhan W in Weybridge, we took up the old tiles in the hallway and kitchen. In the hall, the tiles and the base they were laid on came up to expose the joists underneath. In the kitchen, there was a screed under the tiles.
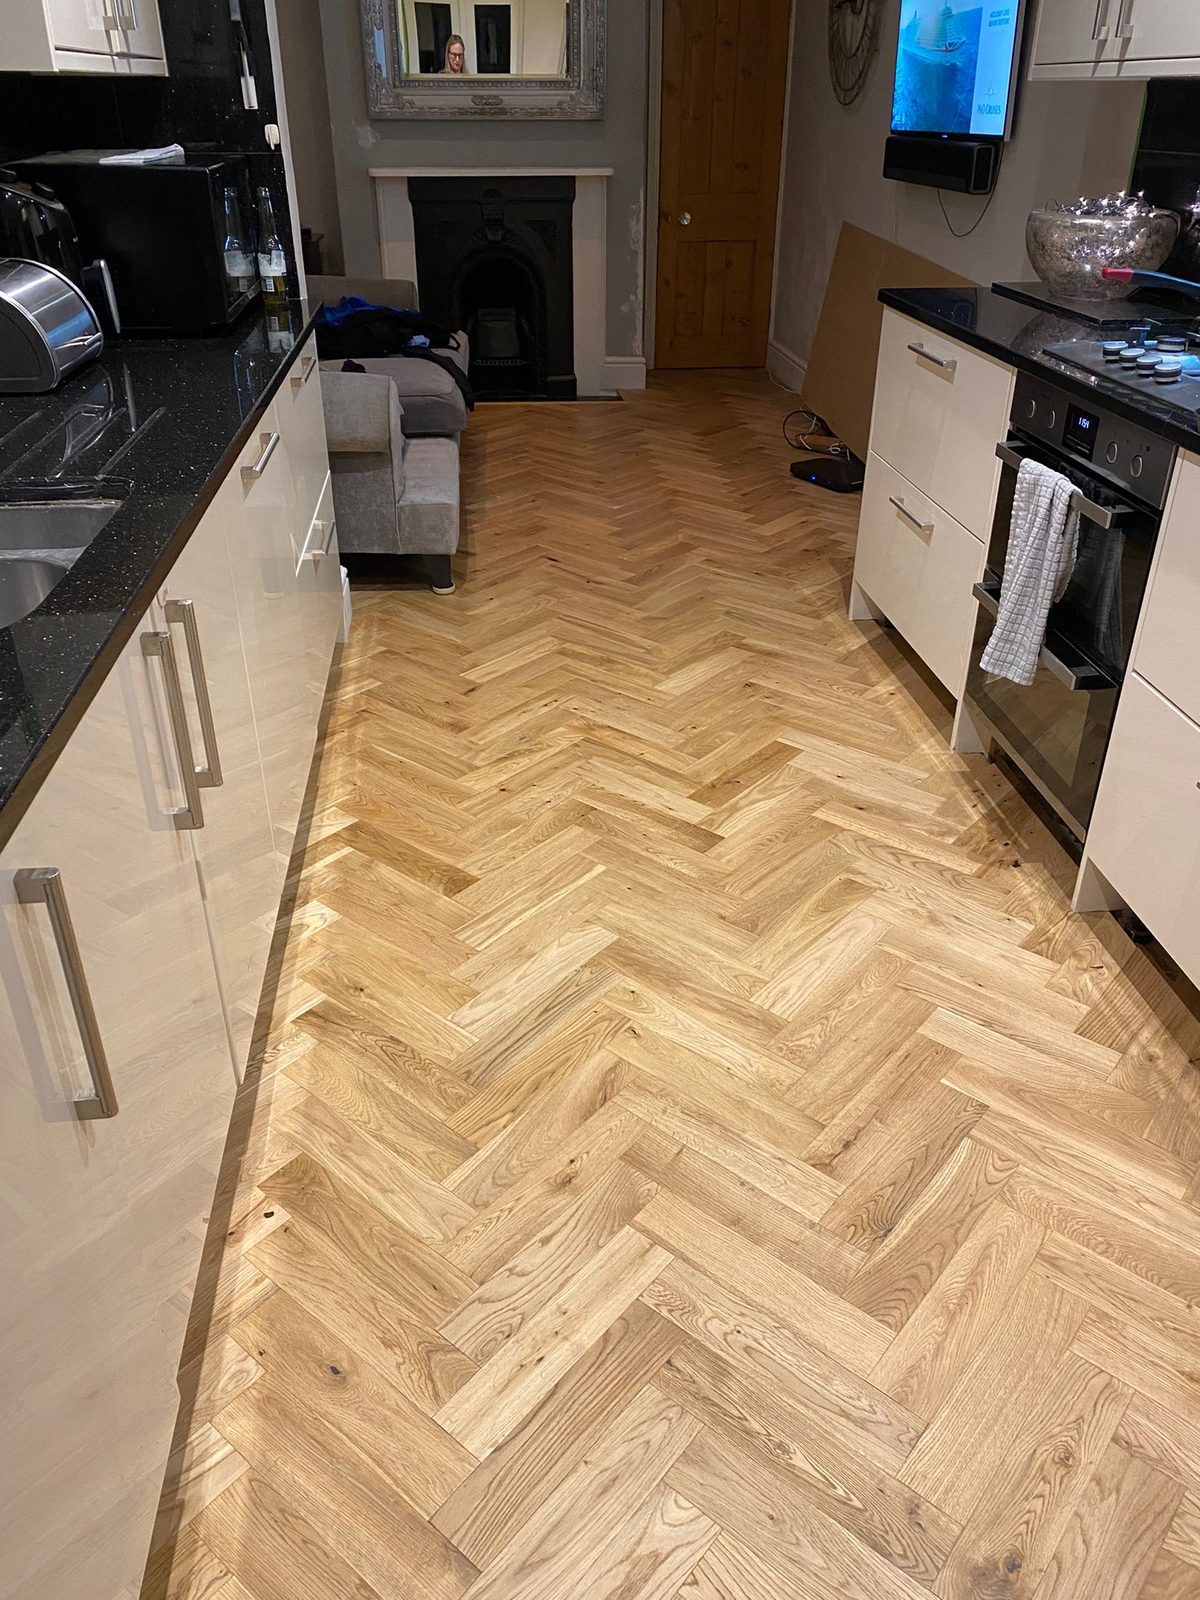
Through the hall and dining end, the joists were secured and levelled with shims where they needed it. Then 18 mm plywood was glued and screwed down over the top, set level with the kitchen screed. The herringbone runs unbroken from the front door, through the hall and dining end, into the kitchen, with a flush finish throughout. On that we glued down 32 m² of Haldon Oak, a rustic oak herringbone: 80 × 350 mm blocks, 20 mm thick with a 6 mm oak top layer, brushed and oiled. New skirting went on to finish.
Plywood over the joists, screed in the kitchen.
In the hall and dining end, with the old base up, the joists were secured and packed level with shims where they needed it. A bead of Bona R848 adhesive was run along the joists and 18 mm plywood screwed down on top, so the boards are held along their length as well as at the screws and don't work loose over the years. The plywood was set level with the screed in the kitchen, which had no plywood: once its tiles were off, the screed became the base. Together they give the herringbone one flat, continuous surface to be glued to.
Every block is fully bonded: glued to the plywood or screed across its whole underside with Bona R848, a hard-elastic adhesive that holds the floor firmly while allowing for the wood's natural movement.

The hall opened up, with new timbers fixed between the joists and the pipes running underneath.

The hall boarded in plywood, with a few blocks laid loose down the middle to set out the pattern.

Laying the hall into the adhesive.
The same spot, dining end to kitchen.
On the left, the plywood in the dining end meets the kitchen, where the tiles are up and the screed is showing. The plywood was set level with the screed. On the right, the same spot finished: one floor, no step and no threshold.
 Before
 After
AfterThe hall and the hearth.

Up to the hearth
In the dining end, the plywood was cut in around the tiled hearth of the cast-iron fireplace, and the herringbone was laid up to it.

A narrow hall
The hall is long and narrow, so the pattern runs in one straight line from the front door, down the hall and through to the end of the dining room. The kitchen opens off to the left.
Hall to kitchen.

The kitchen, to the left of the dining end, towards the back doors.

The hall, laid.

The dining end, part-laid. The hall and front door are behind the camera.

From the hall doorway into the dining end.
Q&A
- Can herringbone go over a suspended timber floor?
- On this job it did. In the hall and dining end we took the old floor up to the joists, secured and levelled them with shims, glued and screwed 18 mm plywood down over them, and glued the herringbone to the plywood with Bona R848.
- Can a tiled hall and kitchen be changed to wood?
- Yes. Here the old tiles came up in the hall and the kitchen. In the hall we rebuilt the base in plywood over the joists; in the kitchen the screed under the tiles became the base. The plywood was set level with the screed, and the herringbone runs through both without a step.
- Does the skirting have to be replaced?
- No. Beading can cover the expansion gap at the edges instead. New skirting gives a cleaner finish, and on this job we supplied and fitted 25 m of it once the floor was down.
Talk to us about your floor.
Tell us what you're after and what's happening on site, and we'll tell you what would work.
- Showroom
- Unit A/B Investment House
28 Queens Road, Weybridge, Surrey, KT13 9UT - Hours
- Mon–Fri 9:00–17:00 · Sat 10:30–15:00
Sun closed - Talk to us
- 01932 640 611
info@akhardwood.co.uk